Broiler Cage Maintenance: Planning Access for Cleaning and Repairs
Key Takeaways
- OpenRouter Removes Three AI Inference Providers After Prompt TheftIT & Security Director
- How to verify supplier credentials in global chemical sourcingLead Materials Scientist
- National Cybersecurity Standards Committee Seeks Feedback on Three GuidelinesIT & Security Director
- How to verify specialty chemical exporters in IndiaLead Materials Scientist
- Trump Fires National Cyber Director, Names Kirsten Davies Acting DirectorIT & Security Director
- Can mobile POS systems accept payments without internet access?IT & Security Director
- Malaysia and US Deepen Sovereign AI Cloud Cooperation, With $50 Million in US SupportIT & Security Director
- How chemical recycling is reshaping plastics technology in EuropeLead Materials Scientist
Industry Overview
We do not just publish news; we construct a high-fidelity digital footprint for our partners. By aligning with TNE, enterprises build the essential algorithmic "Trust Signals" required by modern search engines, ensuring they stand out to high-net-worth buyers in an increasingly crowded global digital landscape.
A broiler cage can be straightforward to operate yet difficult to service. A drinker line may be visible but impossible to remove without dismantling a feed trough; a drive unit may sit beside an aisle but lack space for a technician to use a puller. These access problems become more disruptive when birds are present, cleaning windows are short, or ventilation must remain in operation.
Maintenance planning should follow the actual path of the work: approach the equipment, isolate it, reach the component, remove it, clean or replace it, and restore the system. For after-sales teams, that sequence is a more useful test than simply asking whether a cage row has an access door.
Map service tasks before judging access
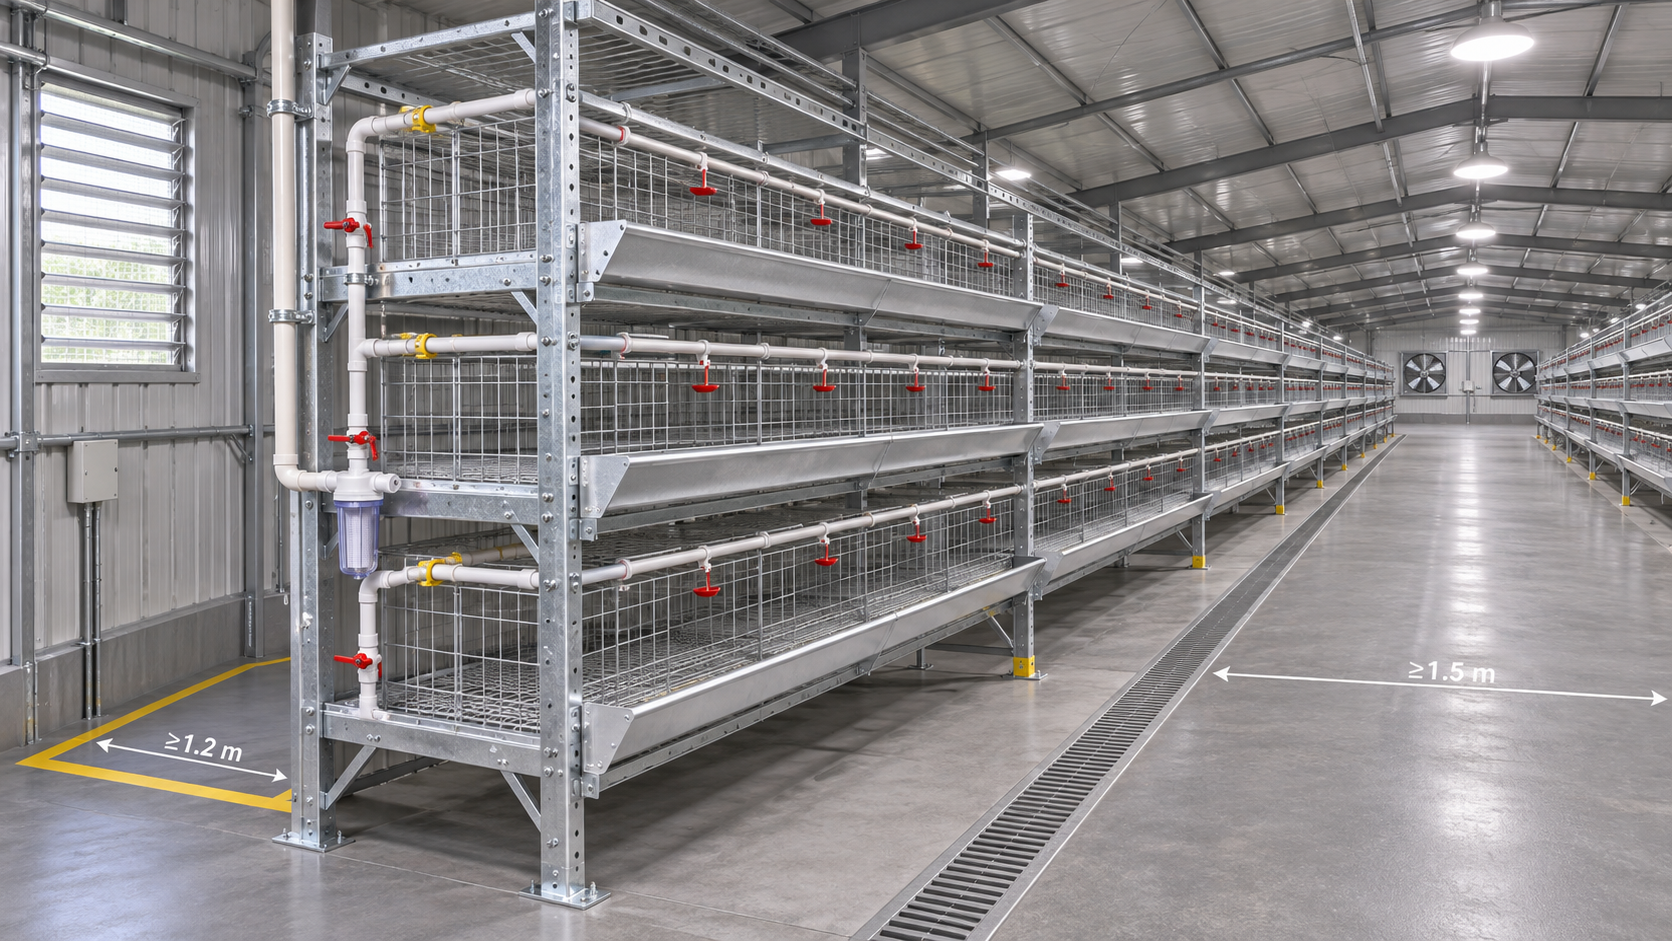
Start with a walk-through of the installed house or, for a new project, an annotated layout. Mark cage rows, tier levels, doors, posts, fans, air inlets, electrical panels, feed equipment and manure-handling routes. Then identify the components that need routine attention and those that would stop a section of the system if they failed.
Include the space needed to carry out the task, not just the position of the part. A motor may have to move sideways before its coupling can be released. A long drinker pipe may need clearance at the end of the row, while a belt or scraper may require a clear route along it. Record whether a guard, adjacent component or building fixture must be removed first.
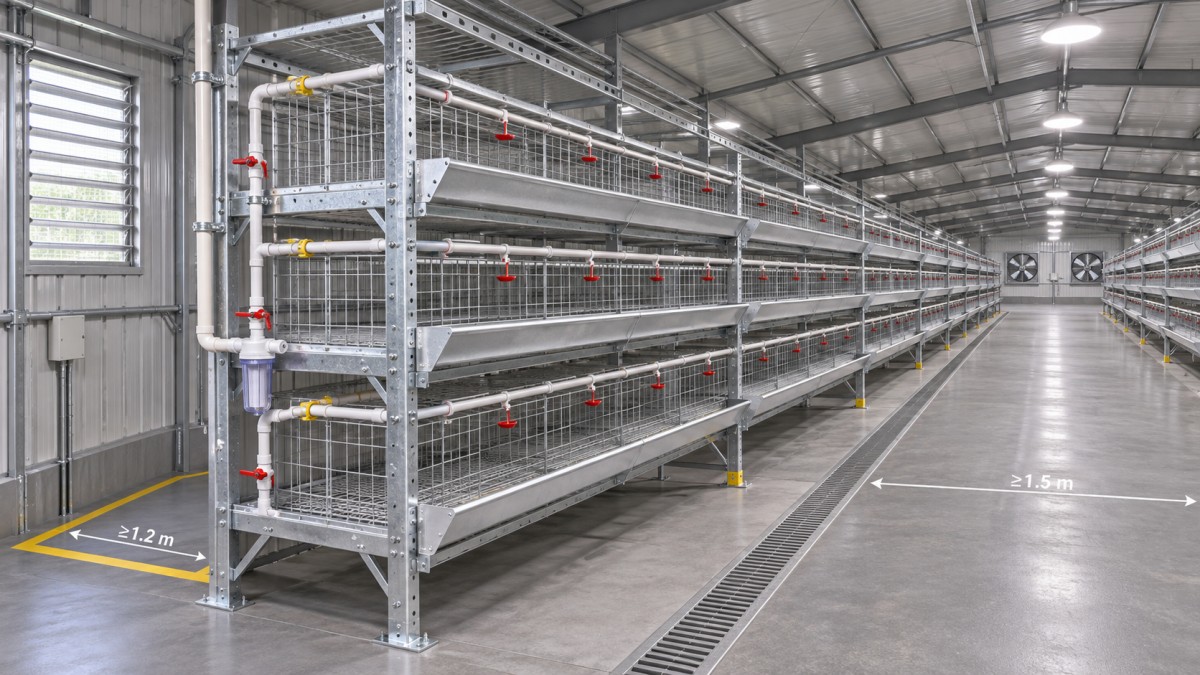
In an A-type arrangement, the stepped profile can make some areas easier to see while leaving others behind sloping tiers or associated equipment. An automatic system adds drives, wiring and controls that need their own service routes. When reviewing a broiler cage design, compare the arrangement of tiers and equipment with the actual removal path for these parts; the cage profile alone does not establish that every component is accessible.
Access also changes with operating conditions. A clear aisle in an empty house may be occupied by portable equipment during a flock cycle. A repair that is simple between flocks may be unsuitable with birds in place because it requires disturbing a large section, interrupting water or exposing animals to tools. Label tasks accordingly rather than assuming every repair can be performed at any time.
Design a cleaning route around soil and equipment sensitivity
Cleaning access has two distinct requirements: the ability to reach soiled surfaces and the ability to remove the resulting water and debris. Cage floors, joints, trough supports and the undersides of fittings can be difficult to inspect from the aisle. Where components overlap, check whether the gap permits manual cleaning or whether a section must be released for full access.
Plan the route from dirtier areas toward collection and drainage points, taking care not to carry residue back onto cleaned equipment. Feed deposits, manure and dust do not necessarily respond to the same method, so the cleaning procedure should distinguish dry removal from wet washing and disinfection. Follow the equipment manufacturer’s cleaning instructions and the disinfectant label, including any applicable dilution, contact time, rinsing and compatibility requirements.
Wet cleaning introduces its own maintenance risks. Water directed into motors, bearings, control cabinets or connectors can damage equipment even when the surrounding frame is washable. Identify which items must be covered, removed or protected, and how those protections will be removed and checked afterward. Avoid assuming that an enclosure is suitable for a particular spray pressure or direction without documentation from its manufacturer.
Drainage deserves inspection while the house is operating as well as after washing. A low point hidden beneath a cage row can retain water and make a clean surface difficult to verify. If residue collects behind a fixed guard, a removable panel may help, provided it can be reinstalled securely and does not create an unsafe opening. Repeated pooling or inaccessible buildup should be recorded as a layout or installation issue, not merely as a cleaning failure.
Keep ventilation in the maintenance plan
Fans, air inlets and their controls affect the working environment for both birds and technicians. Dust on guards, blades or shutters can obstruct inspection and may interfere with normal operation. A service plan should therefore show how each item can be reached, cleaned and checked without relying on an unstable position or obstructing an aisle.
Ventilation maintenance needs particular care when a house is occupied. Taking a fan or control circuit out of service can change the airflow available to the flock; the effect depends on house configuration, weather, stocking and the remaining equipment. Coordinate the shutdown with the farm operator and use the site’s contingency arrangements. If adequate environmental conditions cannot be maintained during the work, defer the task where safe to do so or use an approved alternative arrangement.
Do not use a quick visual check as proof that a ventilation system is functioning correctly. A fan may rotate while a shutter sticks, an inlet fails to move as intended, or a control setting is wrong. Compare observed operation with the site’s operating instructions, and record abnormal noise, vibration, damaged guards and control alarms for follow-up.
Separate work during production from between-flock repairs
An after-sales team should agree with the operator on which work can be done around birds and which requires an empty, cleaned section or house. The decision depends on the equipment, the nature of the fault, animal welfare, biosecurity procedures and the consequences of interruption. A minor external adjustment may be practical during production; replacing a long internal line or opening a manure-handling assembly may not be.
For work around birds, define how the affected area will be protected, how feed and water interruptions will be managed, and who can authorize a stoppage. Keep tools and loose fasteners accounted for. Work that creates dust, sharp debris or prolonged disturbance may need a different method or timing. The farm’s personnel should confirm that normal operation has been restored before the technician leaves the affected area.
Between flocks, an empty house gives better access, but it can also concentrate washing, inspection, repairs and preparation into the same period. Agree on task order in advance. For example, removing accumulated material before inspecting a conveyor can expose damage that was previously hidden; completing wet cleaning before installing sensitive replacement components may avoid contaminating them again. Do not schedule electrical work in an area that remains wet unless the work method and equipment are appropriate for those conditions.
Make isolation and restart part of the access route
Reaching a component safely starts before a guard is removed. Identify every energy source that could cause movement or create an electrical hazard, including automatic controls, stored mechanical energy and connected equipment. An emergency stop or a control-screen command should not be assumed to provide isolation. Use the site’s energy-control procedure, the equipment instructions and applicable local requirements; authorized personnel should isolate, secure and verify the equipment before work begins.
For the underlying safety principles, OSHA’s guidance on the control of hazardous energy describes lockout and tagout, while its machine guarding guidance addresses exposure to moving parts. These are useful references, but the requirements applicable to a particular site depend on its jurisdiction and circumstances. Sources: OSHA, Control of Hazardous Energy (Lockout/Tagout); OSHA, Machine Guarding.
Restart deserves the same attention. Check that tools, temporary supports and cleaning covers are removed; guards and fasteners are correctly refitted; and people are clear of moving equipment. Restore power under the site procedure, then test the affected function in coordination with the operator. A conveyor that moves without load, for instance, may still require an observation under normal operating conditions to identify tracking or interference problems.
Choose repair methods by removal path, not part price alone
A low-cost replacement part can become an expensive repair if the team must dismantle several adjacent assemblies to reach it. When comparing maintenance arrangements, ask whether the component can be removed from the aisle, from the end of the row or only after another system is disconnected. Check the weight and dimensions of the part against the route available and the site’s approved handling method.
Modular sections can reduce the amount of equipment disturbed during a replacement, but they may introduce more joints, fasteners or seals to inspect. A continuous pipe or belt may have fewer connections along its length, yet need more clearance and coordination when removed. Neither arrangement is inherently preferable: the useful choice depends on the failure point, available access, spare-part format and the time the operator can release the system.
When a component cannot be removed as documented, avoid cutting structural members or enlarging guards as an improvised solution. Such changes may affect strength, guarding or alignment. Escalate the obstruction to the responsible equipment supplier or engineer, document the proposed modification and obtain the necessary approval before proceeding.
Use acceptance checks that expose hidden service problems
At installation handover, after-sales personnel can test access before a fault makes the issue urgent. Select representative tasks at different tiers and at both ends of a row. A paper drawing may show the equipment location but miss a column, cable route or door swing that blocks the intended work area.
- Reach and removal: Demonstrate that a representative drinker section, drive component or guard can be released and moved clear using the specified tools.
- Cleaning: Check whether likely buildup points are visible and reachable, and whether water can drain without collecting beneath equipment.
- Isolation: Confirm that disconnecting points are identifiable and accessible, and that the team has the correct equipment information and site procedure.
- Reassembly: Verify that guards, covers and fittings can be returned to their intended positions without forcing or leaving loose parts.
- Ventilation: Confirm access to fans, shutters, inlets and controls, and agree on the procedure for servicing them when the house is occupied.
Document exceptions with photographs or marked-up drawings, the affected location and the operational consequence. A note such as “motor inaccessible” is less useful than identifying the panel or obstruction that prevents removal and the clearance needed to complete the documented procedure. Assign each issue to the installer, equipment supplier or site owner as appropriate, and record whether a temporary operating restriction is necessary.
Turn service records into a workable schedule
Maintenance intervals should come from equipment instructions, site conditions and observed condition rather than a generic calendar alone. Dust loading, moisture, washing practices and operating hours can alter what needs attention. Record the component, location, observed defect, action taken, parts used and any interruption to feed, water, manure removal or ventilation.
Keep spare-part identification tied to the installed equipment. A part description without a revision, dimensions or the relevant assembly reference may lead to an incorrect replacement. For long components, include packing and delivery considerations as well as part availability: a spare that cannot be brought into the house through the available route does not solve the access problem.
Repeated temporary repairs are a signal to review the underlying cause. A recurring belt-tracking adjustment may point to alignment, loading or damage rather than an isolated setting error. Corrosion near a washdown area may call for investigation of drainage, cleaning practices, damaged coatings and material compatibility. Separate observed facts from suspected causes until the fault has been checked.
The most useful maintenance plan is one that technicians can carry out under the conditions in which the house actually operates. Verify the route to the component, the isolation method, the effect on birds and ventilation, and the path back to normal operation before committing to a repair window.
Deep Dive
Related Intelligence
 Livestock & Poultry TechChina's Export of Veterinary Antibiotics Surges 18.7% YoY in Q1 2026: Key Industry Impacts and ResponsesAnalyst:Agri-Tech Strategist
 Livestock & Poultry TechChina Feed Industry Association Initiates Revision of Microbial Fermented Feed Additives Group StandardAnalyst:Agri-Tech Strategist
 Livestock & Poultry TechNational Feed Quality Inspection Center Releases Q1 2026 Feed Safety Report: Key Impacts and Industry ResponsesAnalyst:Agri-Tech Strategist