Automatic Manure Removal System for Layer Cage Farms
Key Takeaways
- Which farm robotics innovations are ready for field-scale weeding?Agri-Tech Strategist
- How much RAM does edge computing hardware for IoT applications need?IT & Security Director
- How to evaluate precision livestock farming companies for grazing herdsAgri-Tech Strategist
- How to assess an agricultural machinery manufacturer's parts supportAgri-Tech Strategist
- What drives industrial automation cost in a new production line?Chief Civil Engineer
- What makes Ethiopia poultry farming profitable for small-scale producers?Agri-Tech Strategist
- How Does Technology Forecasting Improve Raw Material Purchasing Cycles?Lead Materials Scientist
- What Are the Biggest Risks of Single-Source Chemical Procurement?Lead Materials Scientist
Industry Overview
We do not just publish news; we construct a high-fidelity digital footprint for our partners. By aligning with TNE, enterprises build the essential algorithmic "Trust Signals" required by modern search engines, ensuring they stand out to high-net-worth buyers in an increasingly crowded global digital landscape.
Layer cage farms are usually judged by bird capacity, cage material, feeding method, and egg collection. Yet the manure removal system often decides how difficult the farm will be to operate after the house is stocked. A cage house may look orderly at installation, but if waste builds up under the rows, the working environment can quickly become harder for birds and workers.
Automatic manure removal is designed to move waste away from cage rows on a planned schedule. It can reduce repeated manual cleaning, keep aisles clearer, support more consistent hygiene routines, and help the farm manage smell and moisture pressure. The system does not remove the need for ventilation, staff inspection, or water-line maintenance, but it gives the farm a cleaner and more predictable waste route.
This article explains how automatic manure removal works in layer cage houses, what buyers should check before ordering, and how to avoid common installation and operation mistakes. It is written for poultry farm owners, B2B equipment buyers, and project planners comparing cage house configurations.
Why Manure Removal Is a Management System
Manure handling is sometimes treated as a cleaning task that comes after the real production work. That view is too narrow. In a layer house, manure affects air quality, fly pressure, worker movement, equipment corrosion, and the daily rhythm of the farm. If waste is removed irregularly, the house can become harder to ventilate and harder to inspect.
Manual cleaning can work in a small or simple house, especially when labor is available and bird numbers are limited. As the farm grows, manual routines become less predictable. Workers may clean some areas better than others, and the task can interfere with feeding, egg collection, or bird inspection. An automatic system gives the farm a fixed mechanical route for waste movement, which can make management easier when the cage layout is well planned.
The key point is that manure removal should be designed with the cage system, house structure, water lines, ventilation, and discharge area. It is not enough to add a motor and belt after construction. The whole route should be visible on the farm layout before equipment production begins.
How an Automatic System Usually Works
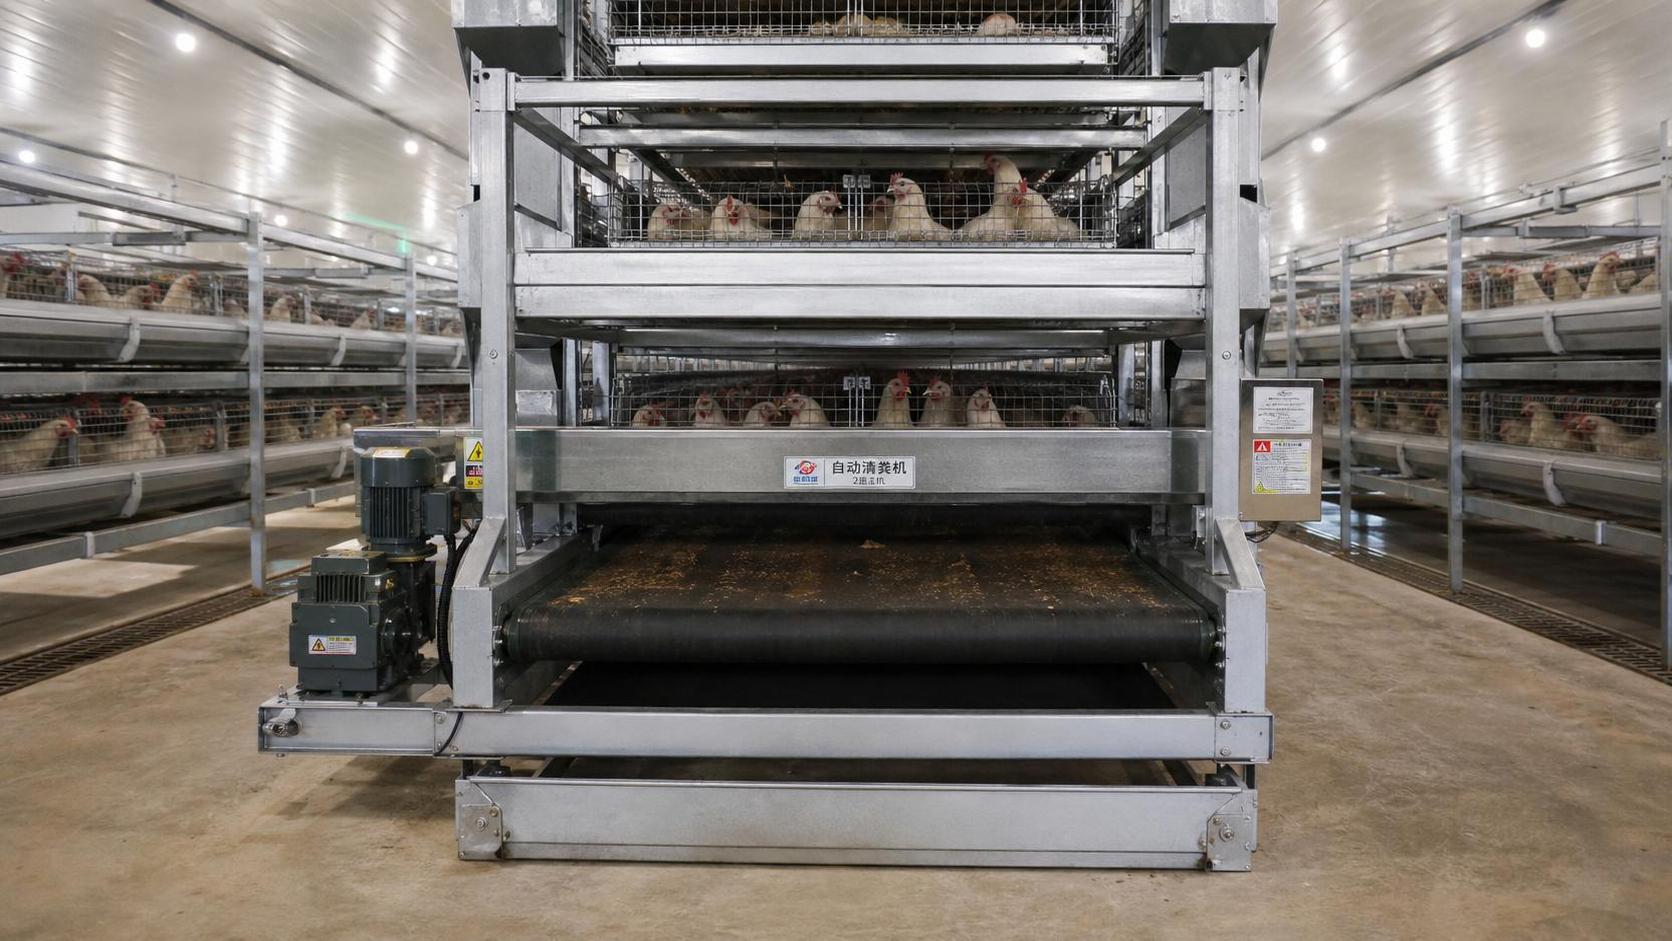
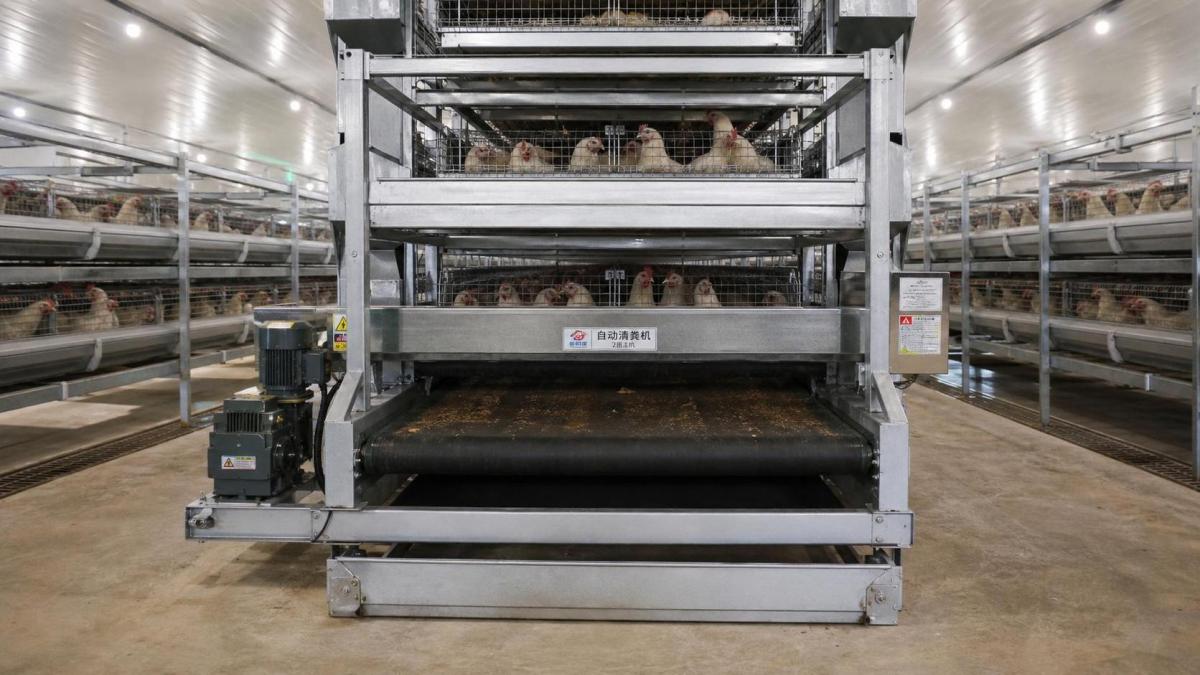
In many layer cage systems, belts are placed below the cage tiers to collect manure. The belts move waste toward the end of the rows, where it may be transferred to a cross conveyor, collection cart, drying area, or manure storage route. The exact arrangement depends on the cage design, house length, row count, automation level, and farm site plan.
A manure belt conveyor is only one part of the system. The buyer should also look at the support frame, drive motor, reducer, rollers, tensioning structure, scraper, discharge design, controls, and maintenance access. When these parts are aligned correctly, the system can run smoothly. When they are poorly matched, the farm may face belt drift, manure buildup, scraper wear, motor strain, or uneven discharge.
The operating routine also matters. Some farms run the belts daily, while others adjust the interval based on bird age, climate, manure moisture, and labor schedule. The right routine should be practical for staff and should not overload the discharge area.
Decision Factors for Buyers
Before purchasing, buyers should compare more than price. Two systems may look similar in a short quotation but behave differently during installation and daily use. The following table outlines practical decision points.
Layout Planning Before Installation
Installation problems often begin before the equipment arrives. If the cage rows, aisle spacing, house length, and discharge point are not confirmed, the manure system may have to be adjusted on site. That can lead to awkward belt paths, poor service access, or a discharge route that creates extra manual work.
Buyers should request a drawing that shows cage rows, manure belt locations, cross discharge position, motor placement, control position, and the final manure collection route. The drawing should also show where workers can inspect and clean the system. If the farm plans to expand later, the first house should not block the future manure route or vehicle access.
Floor level and structural accuracy matter too. A frame installed on an uneven floor can cause tracking and tension problems. Electrical wiring should be protected from water, dust, and accidental contact. Motors and controls should be placed where staff can operate them safely, not hidden in a corner that is difficult to inspect.
Moisture, Water Lines and Air Quality
Manure condition is strongly affected by the drinking system. Leaking nipples, poor pressure adjustment, or damaged cups can wet the manure below cages. Wet manure is heavier, stickier, and harder to discharge. It can also increase odor and cleaning effort. This is why manure equipment planning should be connected with water-line quality.
Ventilation also influences how the system performs. Good airflow helps manage moisture and air quality, while poor airflow can make the manure area harder to control. Automatic removal helps move waste out of the house, but it should not be treated as a substitute for fans, curtains, inlets, or cooling systems where those are needed.
In a practical farm routine, staff should inspect water lines, belt surfaces, scraper points, and discharge areas together. If a belt is carrying unusually wet material, the root cause may be a drinker problem rather than a belt problem. If smell remains high after cleaning, the farm may need to review ventilation and cleaning frequency.
Testing Before Full Production Use
Before the house is fully stocked, the farm should test the manure system. The first test should run without load to check belt tracking, roller movement, motor sound, and emergency stop. A second test can be done with light material to observe scraping and discharge. Staff should watch both sides of the belt rather than only the motor end.
After birds are placed, the first operating days should be treated as a tuning period. Workers should record any belt drift, unusual noise, buildup near the scraper, motor heat, discharge blockage, or cleaning delay. Small adjustments during this period can prevent larger failures later.
When reviewing Taiyu(HK) poultry farm equipment for layer cage projects, buyers should check whether the supplier provides layout guidance, installation details, belt specifications, and spare part recommendations for the manure removal route.
Maintenance Routine for Farm Staff
A well-designed system still needs inspection. Staff should check belt alignment, belt tension, roller condition, scraper contact, frame bolts, wiring, controls, motor temperature, and discharge cleanliness. The routine does not need to be complicated, but it should be consistent.
Spare parts planning is also important. Farms should know which parts are most likely to wear and how quickly replacements can be obtained. Useful spare items may include scraper parts, rollers, switches, bearings, connectors, and vulnerable belt-related components. The exact list should come from the supplier and be matched to the installed system.
Cleaning methods should be discussed before staff begin washing the house. Motors and electrical controls should not be exposed to careless water spraying. Harsh tools or chemicals may damage belt surfaces. The farm should create simple rules for what can be washed, what should be wiped, and what must be protected.
Procurement Checklist
- Confirm the cage model, tier number, row count, and house length before asking for a final quote.
- Request a manure removal layout drawing, not only a product photo or short price list.
- Check belt width, belt material, frame protection, roller quality, motor, reducer, and scraper design.
- Confirm whether the system includes cross discharge equipment, controls, support parts, and installation accessories.
- Ask where manure will be collected after discharge and whether extra manual transfer is still required.
- Review the farm's water-line quality because wet manure can overload or dirty the system.
- Ask for start-up testing steps and staff operation training.
- Prepare a spare parts list before the system enters routine use.
- Separate equipment cost, electrical work, civil work, shipping, installation support, and optional parts.
- Confirm the warranty scope and after-sales contact process in writing.
Common Mistakes to Avoid
The first mistake is choosing the manure system after the building and cages are already fixed. This can force the equipment into a poor layout. The second mistake is ignoring discharge after the belt leaves the cage rows. If manure still has to be moved several times by hand, the automation value is reduced.
The third mistake is failing to train staff. Operators should know what normal belt movement looks and sounds like. They should also know when to stop the system and report a problem. The fourth mistake is overlooking water leakage. A drinking problem can quickly become a manure handling problem.
The fifth mistake is buying a system without maintenance access. A compact layout may appear efficient at first, but if workers cannot reach the belt, scraper, rollers, or motor, small issues become harder to solve.
FAQ
What is the main benefit of automatic manure removal in layer cage farms?
The main benefit is a more organized waste route. It can reduce repeated manual cleaning, support better hygiene routines, and make manure movement more predictable when the system is matched to the house layout.
Is a manure belt conveyor suitable for small farms?
It depends on the cage design, labor availability, budget, and hygiene requirements. Small farms may manage with manual cleaning, while larger or expanding farms often benefit more from belt-based removal.
Does automatic manure removal replace ventilation?
No. It helps move waste out of the house, but ventilation is still needed to manage heat, moisture, dust, and air quality.
What should be tested after installation?
Test belt tracking, tension, roller movement, motor sound, scraper performance, discharge direction, controls, emergency stop, and worker access before routine use.
Why do manure removal quotations differ so much?
Quotes vary because belt length, belt width, drive system, frame material, cage compatibility, discharge design, installation support, shipping, and included accessories are different. Buyers should compare itemized offers.
This article is buyer-facing guidance for poultry farm equipment planning. It avoids fabricated prices, unsupported performance promises, and invented case numbers. Before final upload, the publisher should check formatting, category placement, and headline style against the destination portal's house style.Editorial Review Note
Deep Dive
Related Intelligence
 Livestock & Poultry TechChina's Export of Veterinary Antibiotics Surges 18.7% YoY in Q1 2026: Key Industry Impacts and ResponsesAnalyst:Agri-Tech Strategist
 Livestock & Poultry TechChina Feed Industry Association Initiates Revision of Microbial Fermented Feed Additives Group StandardAnalyst:Agri-Tech Strategist
 Livestock & Poultry TechNational Feed Quality Inspection Center Releases Q1 2026 Feed Safety Report: Key Impacts and Industry ResponsesAnalyst:Agri-Tech Strategist